Hi crafty friends. I’m back in Japan again! This is a card that I coloured in Australia before I came back, but I’m just getting to editing the video and writing up the blog now. I was originally hoping to bring you a one paper pack, 27 card series, but the video editing is taking a loooong time! So, I have a pencil coloured card to share with you today, and a video that includes some footage of late cherry blossom viewing in Japan. The other cards and video will follow soon.
You can see the video here.
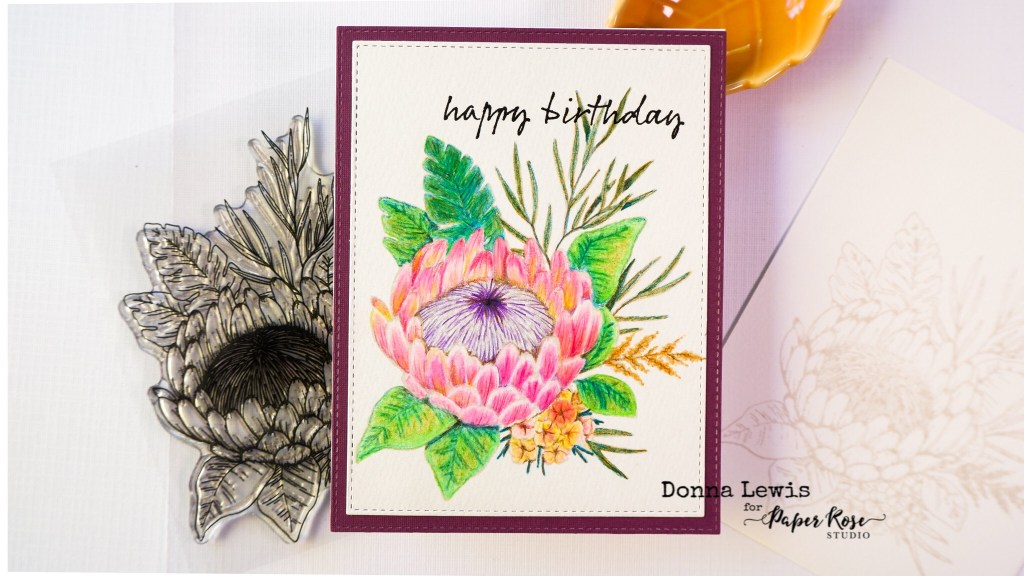
The featured stamp today is Protea Bouquet from Paper Rose Studio. I stamped the image onto paper with a bit of tooth (texture) with pale ink. I chose Fog Ink by Simon Says Stamp, but any pale ink would do, or you could stamp a darker ink onto scrap paper first, and then restamp onto your paper without reinking to get a second generation paler image. I then used an image of proteas that I found on the internet as my inspiration. The protea I chose to base my colours on is called Pink Ice, just in case you need it for your garden!

I had a smattering of various pencils with me in Australia – some more suitable for the job than others, but I mainly used a mix of Prismacolor pencils, and Polychromos pencils. My main issue was that I didn’t have all the colours that I would have liked. Luckily, pencils can be layered up with a light hand so that you can create your own colours. A classic example of this is the thin leaves that stretch to the sentiment at the top, which were coloured in caramel and bright teal green to create that rich brown green that you see. The colouring was done slowly, layer by layer. The video has been sped up at many points so that you can see the process without talking too much of your time, but I tried to cover each of the elements on the bouquet.

Once the colouring was done, I cut the panel using a Stitched Rectangle Die, and stamped the sentiment from the Happy Birthday Thank you stamp with Versafine Onyx Black Ink. Then I chose a burgundy background (after interviewing several colours – see the process on the video) and mounted my image onto the coloured panel.

That’s all! The card is simple, yet it took time and patience to create. I learned as I went. The earlier petals, leaves flowers are not as good as the later ones. I found some pencils half way through the process that helped with blending in the later stages. It’s all part of the creating process, even if it’s a little more chaotic than you’d imagine.
Until next time, may your days be full of flowers.
Blessings
Donna
These are the supplies I used. You can click on the link to shop. Where available, I have used affiliate links, which means that I will receive a small commission at no cost to you. I’ve tried to link to companies in different countries, so you can save on postage costs. Thank you so much for your support.
 My Sweet Petunia MISTI Shop at: SBC | SSS |
 Paper Rose Studio Stitched Rectangle dies USA Shop at: PRS | SBC |
 Polychromos pencils Shop at: O | SSS |
 Versafine Onyx Black ink Shop at: SBC | SSS |
 Paper Rose Studio Protea Bouquet stamp Shop at: PRS | SBC |
 Paper Rose Studio Happy Birthday Thanks stamp Shop at: PRS | SBC |
 Prismacolor Pencils Shop at: SSS |
 Simon Says Stamp Fog Ink Shop at: SSS |
 Paper Rose Card Bases USA size Shop at: PRS | SBC |
